Christmas is a time to gather with family and friends, exchange gifts, and most importantly—enjoy delicious treats! One of the most iconic holiday desserts is the Christmas wreath cookie. With their vibrant green color and festive appeal, they capture the spirit of the season. But if you’re short on time or new to baking, making these cookies may seem like a daunting task. That’s where this easy Christmas wreath cookie recipe comes in.
These cookies are simple to make, require minimal ingredients, and are the perfect holiday treat to share with loved ones. Whether you’re looking for a fun activity to do with the kids or need a quick snack for a party, these wreath cookies check all the boxes. With a step-by-step guide, you’ll be able to make these sweet, crunchy cookies in no time.
2. Ingredients Needed for Easy Christmas Wreath Cookies
Before you dive into the fun part of cookie-making, it’s essential to gather all the necessary ingredients. Fortunately, this recipe doesn’t require any exotic or hard-to-find ingredients, making it accessible for everyone, even beginner bakers.
Here’s a breakdown of the ingredients you’ll need:
- Cornflakes: This is the main base for the wreath cookies, providing a nice crunch and texture.
- Butter: Unsalted butter is ideal for this recipe, as it gives the cookies a rich flavor without being too salty.
- Marshmallows: These help bind the cornflakes together and give the cookies that signature chewy texture.
- Green food coloring: This gives the cookies their classic Christmas wreath color, making them festive and fun.
- Red hots or mini candy canes: These are used as decorations to represent holly berries, adding both color and a burst of sweetness.
- Vanilla extract: Just a touch of vanilla enhances the flavor and makes these cookies irresistible.
- Salt: A pinch of salt balances out the sweetness from the marshmallows and enhances the other flavors.
Optional Ingredient Variations:
- Chocolate chips: Add a bit of extra sweetness and richness by incorporating mini chocolate chips into the mixture.
- Coconut flakes: For added texture and a tropical twist, consider adding sweetened shredded coconut.
3. Equipment You Will Need
While this recipe is easy, there are a few essential tools that will make your cookie-making process smoother. Here’s a quick list of what you’ll need:
- Large mixing bowl: To combine your cornflakes, marshmallows, and other ingredients.
- Saucepan: For melting the butter and marshmallows together. It’s best to use a heavy-bottomed saucepan to prevent burning.
- Spatula: A silicone spatula works best for stirring the mixture, ensuring everything is evenly coated.
- Parchment paper or wax paper: This is helpful for shaping the cookies without them sticking to the surface.
- Cookie sheet: If you’re using a sheet to place the cookies for cooling, a large baking sheet works well.
- Measuring cups and spoons: Accurate measurements ensure you get the right balance of sweetness and texture.
Each of these tools helps streamline the process and ensures your cookies turn out just right. While you don’t need fancy gadgets, having the right equipment on hand will save you time and effort.
4. Step-by-Step Guide to Making Easy Christmas Wreath Cookies
Now that you have your ingredients and tools ready, it’s time to start baking. Follow these simple steps to make your Christmas wreath cookies:
Step 1: Melt the Butter and Marshmallows Start by placing your unsalted butter and marshmallows into a saucepan over medium heat. Stir occasionally to ensure that the butter melts completely and the marshmallows turn into a smooth, gooey mixture. Be patient, as this process might take a few minutes. Once the marshmallows have melted, remove the pan from the heat.
Step 2: Add Food Coloring Next, add a few drops of green food coloring to the melted marshmallow mixture. Stir well until the color is evenly distributed. You can adjust the number of drops based on how vibrant you want the green color to be.
Step 3: Combine with Cornflakes Add the cornflakes to the melted marshmallow mixture. Use your spatula to gently fold the cornflakes into the sticky marshmallow mixture. Be careful not to crush the cornflakes—this will maintain the crunchiness and texture that makes these cookies so delicious.
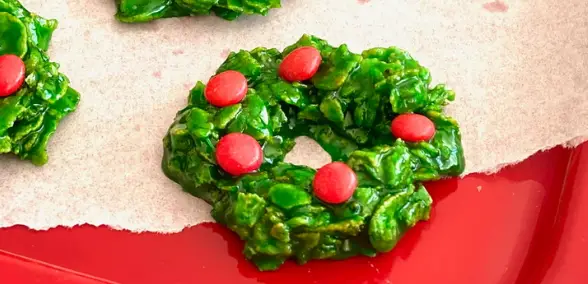
Step 4: Shape the Cookies Once the cornflakes are evenly coated, it’s time to shape them into wreaths. Place a sheet of parchment paper on a flat surface. Lightly grease your hands with a little butter or cooking spray, then scoop out portions of the mixture and form them into small wreath shapes. You can make them as big or as small as you like, but a medium size tends to work best.
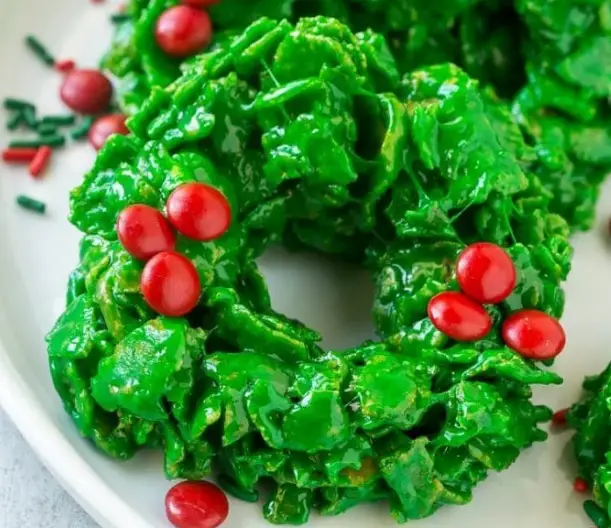
Step 5: Decorate Your Wreath Cookies To finish off your Christmas wreath cookies, decorate them with red hots, mini candy canes, or whatever festive candies you prefer. Place the candies in the center of the wreath or around the edges to resemble holly berries. The decoration is totally customizable, so feel free to get creative with your toppings.
Step 6: Let the Cookies Set Allow your cookies to set and harden. Since the marshmallow mixture is warm when you shape the cookies, they will need some time to cool down and firm up. Leave them on the parchment paper for about 20-30 minutes, or until they are completely cool and set.
5. Tips for Perfect Christmas Wreath Cookies
While this recipe is simple, a few tips can make all the difference in ensuring your Christmas wreath cookies turn out perfectly:
- Work quickly: The marshmallow mixture can start to harden quickly, so it’s important to shape the cookies while it’s still warm and pliable.
- Don’t crush the cornflakes: Gently fold them into the marshmallow mixture to maintain their crunch.
- Grease your hands: To prevent the sticky mixture from sticking to your hands, lightly grease them with butter or cooking spray before shaping the cookies.
- Customize decorations: Besides candy, you can also use colored sprinkles, mini chocolate chips, or even edible glitter to give your wreath cookies a unique touch.